Tips, Tricks and Shortcuts (Windows 10)
October 2017
Caveat!
-
The material in this presentation is aimed at Windows 10.
-
Most things described here will work in earlier versions of Windows.
-
The earlier your version of Windows (e.g., Windows XP), the more differences you may notice.
Keyboard shortcuts
-
Keyboard shortcuts are an important skill to master in Microsoft Windows.
-
Some shortcuts are product specific. For example, in MS Word and Powerpoint:
-
Ctrl+apostrophe, E → é
-
Ctrl+grave accent, E → è
-
Ctrl+shift+colon, U → ü
-
-
However, a lot of the keyboard shortcuts can be used in most Windows programs:
-
Ctrl+S → save
-
Ctrl+C → copy
-
Ctrl+X → cut
-
Ctrl+V → paste
-
Ctrl+A → select all
-
-
Some keyboard shortcuts are useful for controlling Windows itself:
-
Alt+tab → cycle through open programs
-
Alt+F4 → close active program (use with caution!)
-
-
You can find a more complete list here: https://support.microsoft.com/en-us/help/12445/windows-keyboardshortcuts
Control panel
-
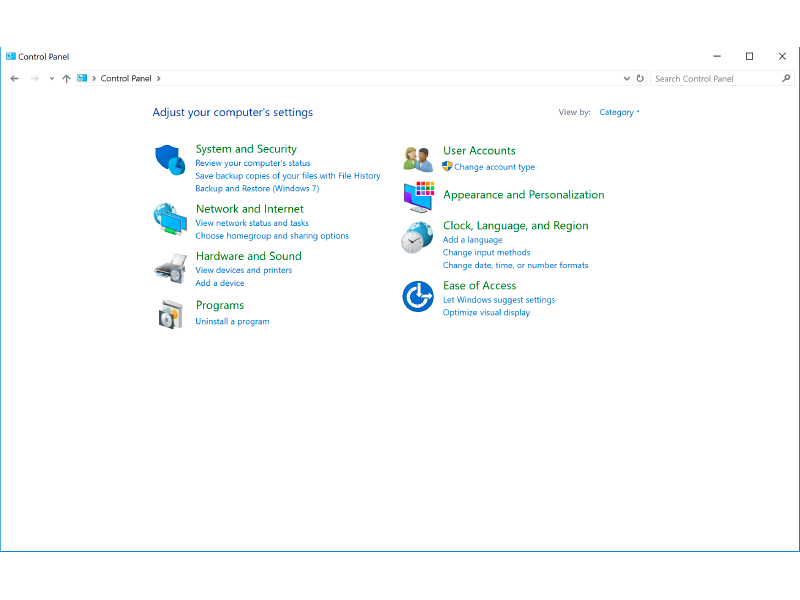
On a freshly-installed version of Windows, the control panel looks something like this:
-
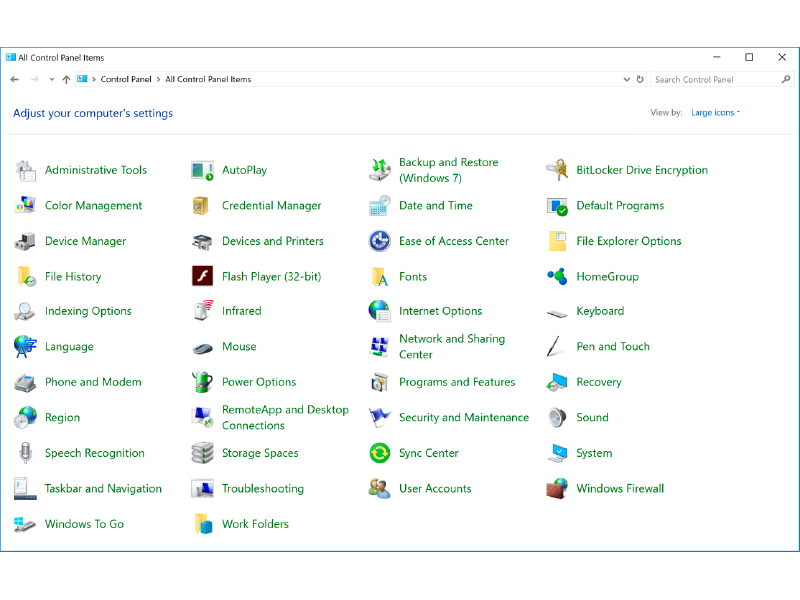
I find it much more useful to change the view by value to small icons or large icons:
Uninstalling programs
-
Whenever you want to uninstall a program:
1. Open the control panel;
2. Select programs and features; this will display a list of all installed programs;
3. Select the program you want to uninstall; and
4. Right-click on the program, and select “Uninstall”.
Forcing a program to close
-
Sometimes, a program just refuses to close.
-
You can force the program to close by using the Task Manager.
-
Open the Task Manager by:
-
Typing its name into the Windows search box (in the lower-left corner of the Windows desktop), or
-
Press Ctrl-Alt-Del, then select Task Manager.
-
-
-
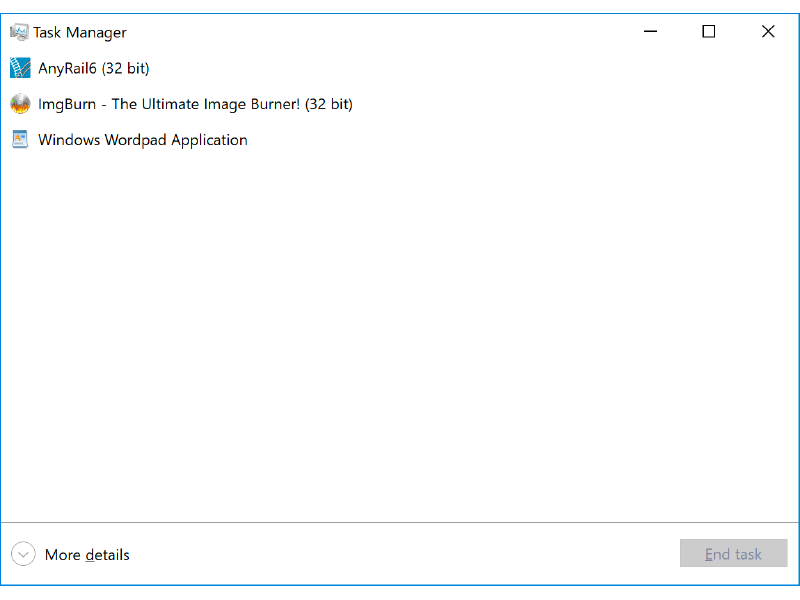
You should see a window something like this:
1. Select the program you want to terminate; the End Task button becomes active;
2. Click on the End Task button; and the selected program will terminate.
Controlling startup programs
-
From time-to-time, you may wish to see what programs automatically start up when Windows starts.
-
Sometimes, when you install a program, it may install other programs (e.g., a program that checks for updates).
-
You may or may not want to disable some of these so that they are not taking up time and other resources.
-
If you see a startup program you don’t recognize, Google it.
-
-
To check your startup programs:
1. Open the task manager;
2. If it looks like the one we saw earlier, click on the More details button at the bottom of the Task Manager;
3. The Task Manager window will expand to include a number of tabs across the top;
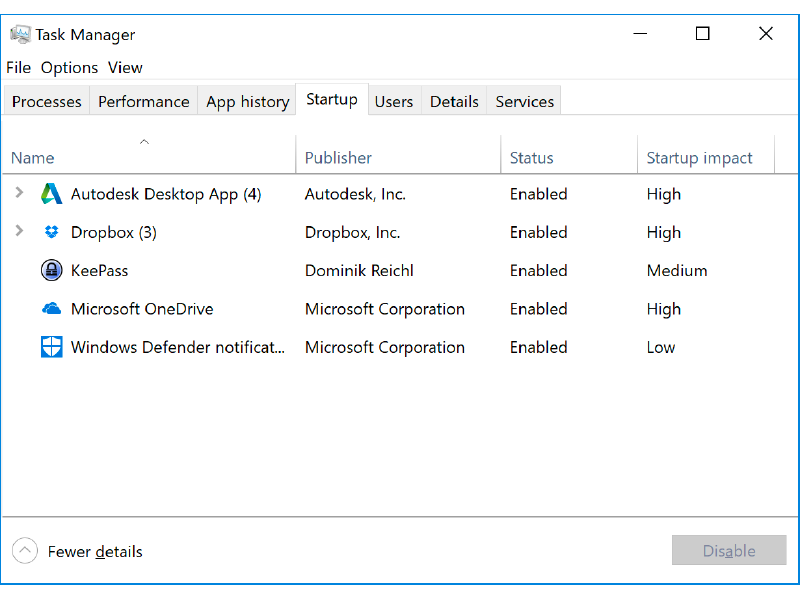
4. Select the Startup tab; the window will look something like this;
5. Select the program you want to disable or enable, then right-click on it; and
6. On the menu, select disable (if the program currently is enabled) or enable (if currently disabled).
Windows Explorer
-
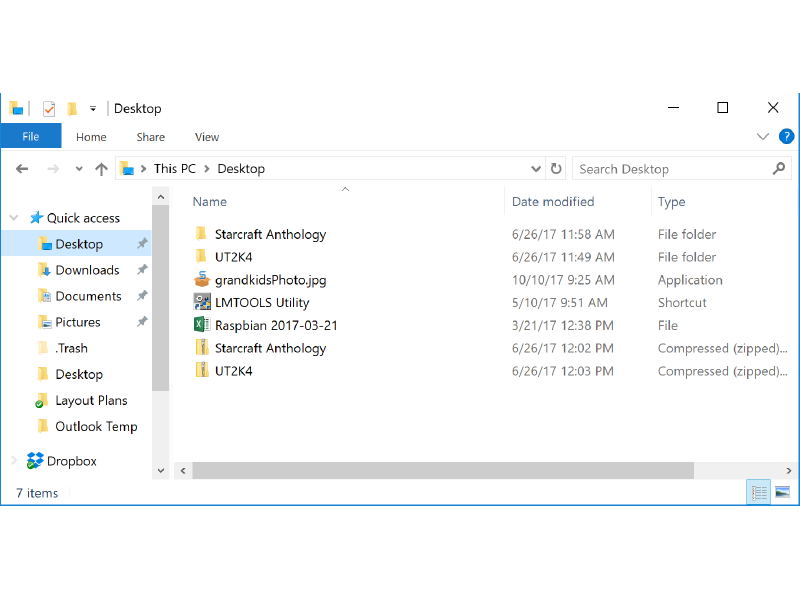
In a freshly-installed version of Windows, the Windows Explorer does not display file name extensions. For example:
-
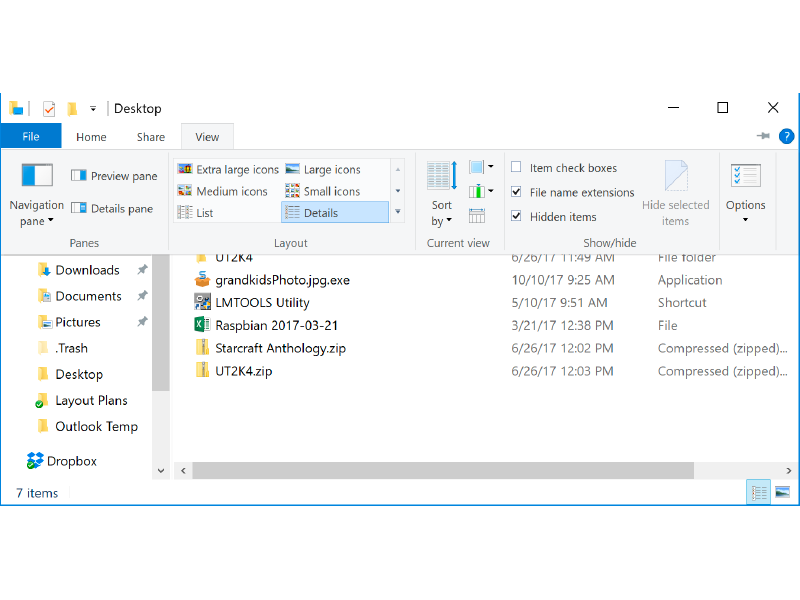
The file “grandkidsPhoto.jpg” on the desktop actually is a file named “grandkidsPhoto.jpg.exe”.
-
If you double-click on the file to open it, you will be in for a surprise.
-
You can instruct the Windows Explorer to show file name extensions – and set other properties – from the View menu.
-
You also can change the way files are displayed: icons (for photos), a list, or a detailed list.
-
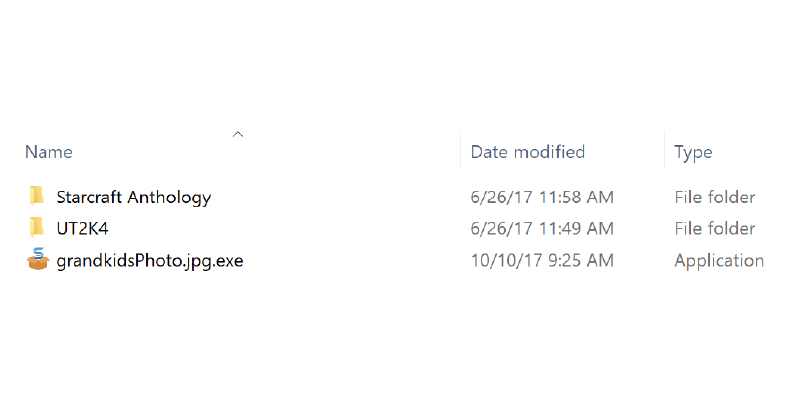
By default, files are organized alphabetically, by name, in ascending order, as we see in this image:
-
The symbol (either ∧ or ∨) next to Name tells us that Name is the current column and whether the column is sorted in ascending or descending order, respectively.
-
Clicking on the current sorting column name will toggle between ascending and descending order.
-
Clicking on a different column name (e.g., Date modified or Type) will make that column the current one and sort the files based on that column, in ascending order.
-
To change the name of a file:
1. Click once on the file name, pause for a brief moment, and click again;
2. A box will appear around the file name and the background of the box becomes blue (but not the extension);
3. You now can type in a new name and then press the Return key.
4. To change the whole name (including the extension), double-click on the file name after step 2, then type in the name you want.
-
If you add, delete, or modify files and don’t see the changes appear in the Windows Explorer, select its window and then press F5 to refresh its contents.
-
To change the name of a file:
1. Click once on the file name, pause for a brief moment, and click again;
2. A box will appear around the file name and the background of the box becomes blue (but not the extension);
3. You now can type in a new name and then press the Return key.
4. To change the whole name (including the extension), double-click on the file name after step 2, then type in the name you want.
Aero Snap
-
If you are like me, you generally have more than one program open at a time.
-
Aero snap can make it easier to arrange these windows on your desktop.
-
Aero Snap
-
Grab a window by its title bar and drag it to the:
-
Display top to fill the whole screen with the window.
-
Display (left or right) side to fill that half of the display with the window.
-
Further, you will be offered a choice of other windows to fill the other half of the display. (If you don’t want to choose one, just click on the desktop or in the first window.)
-
If you choose two windows to fill the display, you can move the border between them to the left or right by dragging that border with your mouse.
-
-
Display side, near the top or bottom to fill that quarter of the display with the window.
-
-
Or, grab the bottom of a window and drag it to the bottom of the display. Its height now will fill the display from top to bottom, but its width will remain the same.
-
And, of course, there are some keyboard shortcuts:
-
Windows + Left → Snap current window to the left (from right to original to left).
-
Windows + Right → Snap current window the the right.
-
Windows + Up → Maximize current window (from minimized to original to maximized)
-
Windows + Down → Minimize current window.
-
Screen capture
-
You may know already that pressing the print screen key on the keyboard captures the current display contents to the clipboard.
-
But, did you know that you can capture just the currently-selected window by pressing Alt-print screen?
Typing shortcuts
-
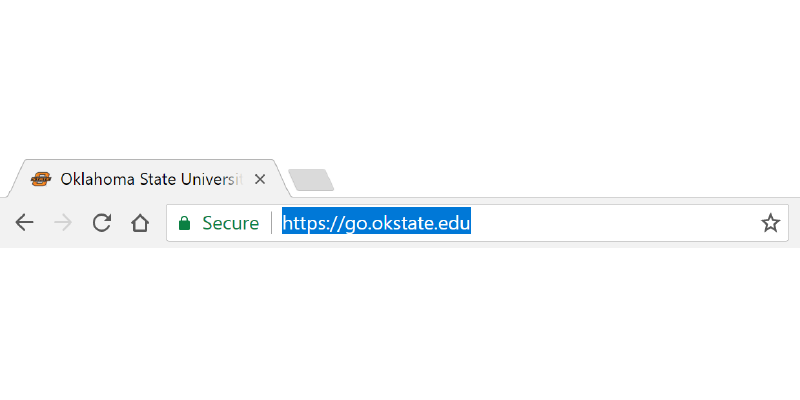
When you select text and its background color changes to blue (e.g., when you click on the Web address at the top of a browser), you do not have to erase the text by pressing backspace or delete.
-
You simply can begin typing, and the new text will replace the highlighted text.
-
-
If you are filling out sequence of text boxes (say, a form on a Web page), you can press the tab key to move from field to field.
-
You don’t have to click the mouse in the next text box.
-
The spoken word
-
The Windows search box (lower-left corner) has a microphone icon at its right edge.
-
Tap on this icon, and (if you have a microphone), you will be able to use Cortana.
-
Cortana is sister to Siri (Apple), Alexa (Amazon), and Bixby (Samsung).
-
You can use your voice to make inquiries and execute programs.
-
-
On your mobile devices, such technology comes in handy for searching, sending texts, and making calls.
Accessibility
-
Windows has a good collection of accessibility tools for folks with physical challenges. These include:
-
The narrator and audio descriptions– a screen reader.
-
The magnifier – make the desktop larger than the display, and the contents larger as well; it includes the ability to scroll around on the larger desktop.
-
Increase cursor and pointer sizes - to make them easier to find.
-
Change mouse pointer speed, double-click speed, etc.
-
Cortana – as mentioned earlier.
-
-
For more information, check out this website: https://www.microsoft.com/en-us/accessibility/windows
Active hours
-
Sometimes, Windows tries to update while you are busy on the computer.
-
To remedy this, you can set your active hours, and Windows will apply updates outside of those hours (assuming the computer is turned on).
1. Press the Windows button;
2. Select Settings (⚙) > Update & security > Windows Update;
3. Select Change active hours.
4. Choose the start time and end time for active hours, and then select Save.
Oh, and one more thing …
-
One of my rules is, “you can never have enough Windows desktop space.”
-
If you are interested in creating customized, expanded work layouts, take a look at the website https://www.howtogeek.com/197625/how-to-usevirtual-desktops-in-windows-10/

